Setting up mail server
2022-06-06 update: This article covers most of the important stuff when it comes to setting up a mail server. I'm pretty proud of where this brought me so far. A list of contents:
- Open ports needed for mail delivery, submission, and retrieval
- Set up Postfix (mail transfer agent) and Dovecot (mail delivery agent)
- Create and link Maildir-format mailboxes
- Create DNS MX records, and TXT records for SPF, DKIM, DMARC, and BIMI
- Enable SASL plaintext authentication over implicit TLS for SMTP, POP3, and IMAP
This overview is tested for Ubuntu 20.04 LTS.
In reference to this Postfix setup tutorial. Here's some trivia:
- Postfix designed from ground-up with security focus.
-
- More tutorials on heap exploitation (but very much out-of-topic)!
- List of vulnerabilities are few, rare and between.
-
- Comparisons between different mail transfer agents (MTA), see image below sourced from http://shearer.org/MTA_Comparison.
- Ubuntu has its own tutorial on Postfix setup.
Test your mailing capabilities here: https://www.mail-tester.com/
For now a quick record of what needs to be done.
Different operating systems / applications mandate rules on what a server's hostname should be, but generally should be a short name. Good practice to set FQDN as first column in /etc/hosts.
# /etc/hosts
223.25.79.103 pyuxiang.com
127.0.0.1 localhost
...
Setting MX record
| Record | Name | Value | Comment |
|---|---|---|---|
| A | @ | 223.25.79.103 | Apex domain points to IP, the usual |
| MX | @ | mail.pyuxiang.com. | MX points to domain name (apex or otherwise), must be A record |
| A | 223.25.79.103 | OK, subdomain points to IP, in contrast... | |
| CNAME | pyuxiang.com | ... this is not OK, according to RFC-821 S3.1 |
Verify that the DNS records have propagated:
justin@wasabi:~$ host pyuxiang.com
pyuxiang.com has address 223.25.79.103
pyuxiang.com mail is handled by 0 mail.pyuxiang.com.
justin@wasabi:~$ host mail.pyuxiang.com
mail.pyuxiang.com has address 223.25.79.103
Installing Postfix
On Ubuntu 20.04 LTS, as simple as:
sudo apt install postfix
Set the desired type of mail server (typically Internet site to send and receive mail directly to/from other MTAs), and the FQDN for the desired email addresses.
Note the configuration files are housed at /etc/postfix/main.cf and the mail name at /etc/mailname.
Verify that port 25 is automatically opened by Postfix:
sudo ss -lnpt | grep master
Allow it over firewall + port forwarding on the router. Ports can be quickly checked using an online port scanner. Verify that the outbound port 25 is also open, with a quick telnet connection:
justin@wasabi:~$ telnet gmail-smtp-in.l.google.com 25
Trying 142.251.10.27...
Connected to gmail-smtp-in.l.google.com.
Escape character is '^]'.
220 mx.google.com ESMTP s14-20020a056a00178e00b004f124e36301si13717757pfg.77 - gsmtp
ehlo gmail-smtp-in.l.google.com
250-mx.google.com at your service, [223.25.79.103]
250-SIZE 157286400
250-8BITMIME
250-STARTTLS
250-ENHANCEDSTATUSCODES
250-PIPELINING
250-CHUNKING
250 SMTPUTF8
^]
If only IPv4 is available:
justin@wasabi:~$ postconf inet_protocols
inet_protocols = all
justin@wasabi:~$ sudo postconf -e "inet_protocols = ipv4"
justin@wasabi:~$ sudo systemctl restart postfix
Redirect emails from root to a regular user, in /etc/aliases (note the postmaster alias is required by RFC2142):
# /etc/aliases
postmaster: root
root: justin
Modify the configuration:
# /etc/postfix/main.cf
myhostname = mail.pyuxiang.com
mydestination = $myhostname, pyuxiang.com, localhost.localdomain, localhost
Emails can now be sent:
echo "test mail" | sendmail EMAILADDRESS@gmail.com
Receiving mails will fall into the /var/mail directory (or as configured in main.cf).
justin@wasabi:/var/mail$ cat justin
From justin@pyuxiang.com  Tue Mar  1 23:48:07 2022
Return-Path: <justin@pyuxiang.com>
X-Original-To: postmaster
Delivered-To: postmaster@pyuxiang.com
Received: by mail.pyuxiang.com (Postfix, from userid 1000)
        id 3961238D05D; Tue,  1 Mar 2022 23:48:07 +0800 (+08)
Message-Id: <20220301154807.3961238D05D@mail.pyuxiang.com>
Date: Tue,  1 Mar 2022 23:48:07 +0800 (+08)
From: Justin <justin@pyuxiang.com>

this is a test email
Email authentication
Following this EmailOnAcid article. Quick overview of the respective TXT RR formats as follows in this article.
SPF record
See this for format: https://www.cloudflare.com/learning/dns/dns-records/dns-spf-record/
Check SPF record: https://dmarcian.com/spf-survey/?domain=pyuxiang.com
TXT @ v=spf1 mx ~all
Some folks might think that -all will be better as it will reject emails from untrusted hosts. Well, using -all in your SPF policy can cause your own emails to be rejected when the recipient has two SMTP servers and the main SMTP server goes offline, your emails will be temporarily stored on the backup SMTP server. When the main SMTP server comes back online, the email will be relayed from the backup SMTP server to the main SMTP server. Since you didn’t list the recipient’s backup SMTP server in your SPF policy, the email will be rejected by the recipient’s main SMTP server. So you should use ~all in your SPF policy.
Add SPF checking to Postfix:
sudo apt install postfix-policyd-spf-python

# /etc/postfix/master.cf
policyd-spf  unix  -       n       n       -       0       spawn
  user=policyd-spf argv=/usr/bin/policyd-spf

# /etc/postfix/main.cf
policyd-spf_time_limit = 3600
smtpd_recipient_restrictions =
   permit_mynetworks,
   permit_sasl_authenticated,
   reject_unauth_destination,
   check_policy_service unix:private/policyd-spf

sudo systemctl restart postfix
DKIM record
More details on DKIM: https://help.returnpath.com/hc/en-us/articles/222481088-DKIM-DNS-record-overview
The public key protocol can be specified, recommended to have 1024-bit or 2048-bit RSA-SHA256.
sudo apt-get install opendkim opendkim-tools
Not sure why the linuxbabe tutorial suggests to add postfix to the opendkim group.
Digital Ocean's tutorial suggests the following - see the tutorial for explanation...
# /etc/opendkim.conf
AutoRestart             Yes
AutoRestartRate         10/1h
UMask                   002
Syslog                  yes
SyslogSuccess           Yes
LogWhy                  Yes

Canonicalization        relaxed/simple

ExternalIgnoreList      refile:/etc/opendkim/trusted.hosts
InternalHosts           refile:/etc/opendkim/trusted.hosts
KeyTable                refile:/etc/opendkim/key.table
SigningTable            refile:/etc/opendkim/signing.table

Mode                    sv
PidFile                 /var/run/opendkim/opendkim.pid
SignatureAlgorithm      rsa-sha256

UserID                  opendkim:opendkim

Socket                  inet:12301@localhost
Connect the milter to Postfix:
# /etc/default/opendkim
SOCKET="inet:12301@localhost"

# /etc/postfix/main.cf
milter_protocol = 2
milter_default_action = accept
smtpd_milters = inet:localhost:12301
non_smtpd_milters = inet:localhost:12301
Create keys!
sudo mkdir -p /etc/opendkim/keys/pyuxiang.com

# /etc/opendkim/trusted.hosts
127.0.0.1
localhost
*.pyuxiang.com

# /etc/opendkim/key.table
mail._domainkey.pyuxiang.com pyuxiang.com:mail:/etc/opendkim/keys/pyuxiang.com/mail.private

# /etc/opendkim/signing.table
*@pyuxiang.com mail._domainkey.pyuxiang.com

### Creating key
sudo opendkim-genkey -s mail -d pyuxiang.com -b 2048 -D /etc/opendkim/keys/pyuxiang.com -v

### Permissions
sudo chown -R opendkim:opendkim /etc/opendkim
Finally, add the public key to the DNS record, linking TXT mail._domainkey:
sudo cat /etc/opendkim/keys/pyuxiang.com/mail.txt
mail._domainkey IN      TXT     v=DKIM1; h=sha256; k=rsa; p=MIIBIjANBgkqhkiG9w0BAQEFAAOCAQ8AMIIBCgKCAQEA4mT6AcEgMG2yt7xZu2Jmx+agpZ2Ksk9MmTLO6LDu4wY+oIRfhOp751ZUopNKE4jyrZ3ujauUZN98H5yh8KOAV5Ijte0JB4kFzV3W8QO+5u4P1GWH90NiZC+tQhO22YIqw7n4jtKbz6ZUt6Yt4Tp30o4qCUu6NBD1A43kzgN7QNA+MgT+oGzF3M/oskFCz57FufsZuZTnKkt9w4NXd4OuyHelOWC1ymaQynTgodlxVclfxD9248lZlvmgvABTFCgci8YRZHq3kzWP9mfL7uJjz62YMUH6UTHb5qG/TKx5wrZAdpE8rixCuid6dJv/Fn/Vh1lqcK6ILg6emLhFX5W7OQIDAQAB
Restart the services:
sudo systemctl restart postfix
sudo systemctl restart opendkim
Verify key working:
justin@wasabi:/etc/opendkim$ sudo opendkim-testkey -d pyuxiang.com -s mail -vvv
opendkim-testkey: using default configfile /etc/opendkim.conf
opendkim-testkey: checking key 'mail._domainkey.pyuxiang.com'
opendkim-testkey: key not secure
opendkim-testkey: key OK
Additional checks:
# https://www.mail-tester.com/
justin@wasabi:/var/mail$ {
> echo From: justin@pyuxiang.com
> echo To: test-carp4fdr5@srv1.mail-tester.com
> echo Subject: Test email
> echo
> echo Test message 3
> } | sendmail -t

# Check email reply from Port25.com
echo "" | sendmail check-auth@verifier.port25.com
Helpful: http://www.open-spf.org/action_browse_id_FAQ/Common_mistakes_revision_26/#helo
- Add
v=spf1 -allfor domains that do not send mail - Add
v=spf1 a ~allfor the mail server HELO
DMARC policies
Direct guidance from the DMARC website.
DMARC relies on existing SPF and DKIM authentication methods to perform email authentication, itself providing policies recommended by the email server to email clients on how to process emails which fail authentication.
Resources:
Add the _dmarc TXT record as well: v=DMARC1; p=none; sp=reject; fo=1; adkim=s; aspf=s; rua=mailto:aggregate_reports@pyuxiang.com
vis the DMARC version, as of 2022 only has version 1pdefines policy for mail from root domain, i.e. none, quarantine, rejectspdefines policy for mail from subdomains, if not definedpctadjusts percentage of emails to apply specified policy (policy none is applied for the rest)foadjusts the verbosity of DMARC reports, 0 for all checks failed, 1 for any checks failedadkimadjusts strictness of DKIM validationaspfadjusts strictness of SPF validationruadefines email address to send DMARC aggregate reports to
Very nice comment on the usage of pct: https://www.valimail.com/blog/what-you-need-to-know-about-the-pct-tag-in-dmarc-records/ In short, pct percent is envisioned to allow slower rollout for confidence that mails are delivered. Typical upgrade of policies:
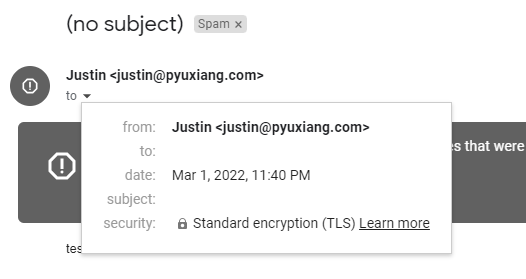
p=none;: No policy applied, initial checks for mail delivery (see pictures below)p=quarantine; pct=0;: Quarantine policy applied, mainly to check From munging behaviour of mailing lists (although munging causes DMARC reports to be sent to the mailing list instead)p=quarantine;: Quarantine policy enforcedp=reject; pct=50;: Reject policy selectively applied, the rest quarantined (not valid for BIMI)p=reject;: Reject policy enforced
Additional verification:
justin@wasabi:/var/mail$ dig txt +short _dmarc.pyuxiang.com
"v=DMARC1; p=none; sp=reject; fo=1; adkim=s; aspf=s; rua=mailto:aggregate_reports@pyuxiang.com"
justin@wasabi:/var/mail$ opendmarc-check pyuxiang.com
DMARC record for pyuxiang.com:
        Sample percentage: 100
        DKIM alignment: strict
        SPF alignment: strict
        Domain policy: none
        Subdomain policy: reject
        Aggregate report URIs:
                mailto:aggregate_reports@pyuxiang.com
        Failure report URIs:
                (none)
More verification methods:
justin@wasabi:/var/mail$ sendmail -t
From: Justin <justin@pyuxiang.com>
To: EMAILADDRESS
Subject: DMARC check email

Hopefully this ends up in the inbox instead of spam!

Regards,
Justin
.
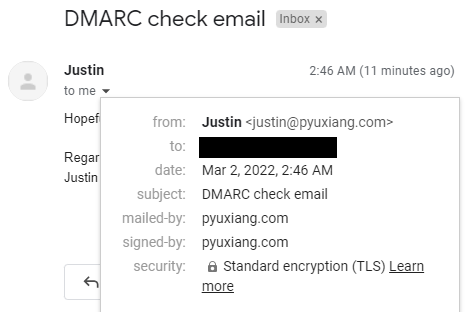
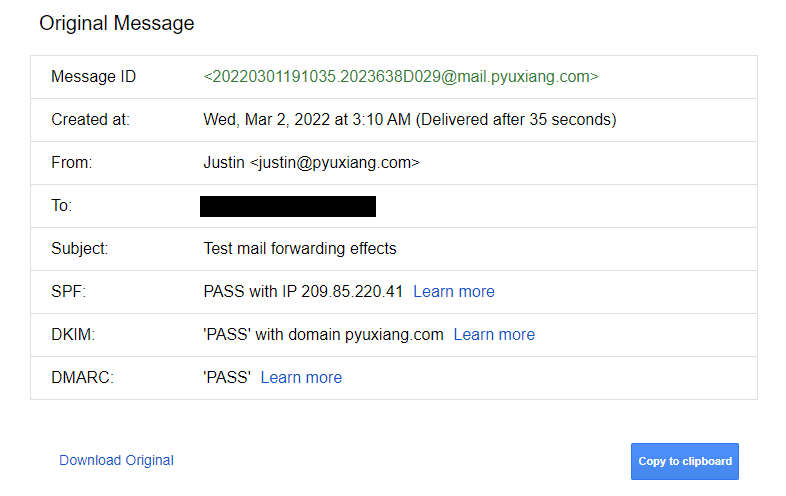
Seems to work well with email forwarding in place too:
DMARC monitoring tool: https://domainaware.github.io/parsedmarc/
Yet another article talking about DMARC: https://seanthegeek.net/459/demystifying-dmarc/
BIMI
BIMI is not really possible: Need trademark over logo + Verified Mark Certificate that costs ~$1k + DMARC policies of at least "quarantine". The other steps of creating and hosting SVG of icon is otherwise easy enough. The TXT record looks a bit like this: mail._bimi TXT "v=BIMI1; l=https://cdn.mydomain.com/bimilogo.svg;".
See this article for a rather nice resource on what needs to be done for BIMI.
Actually BIMI record fall under two categories: (1) self-asserted, (2) certified. According to a forum post, this certification requires CRL, as opposed to Let's Encrypt leveraging OCSP, so probably no such offering. In any case, the whole point is to tie a domain to a company, so trademarks are legal stuff, and legal stuff costs.
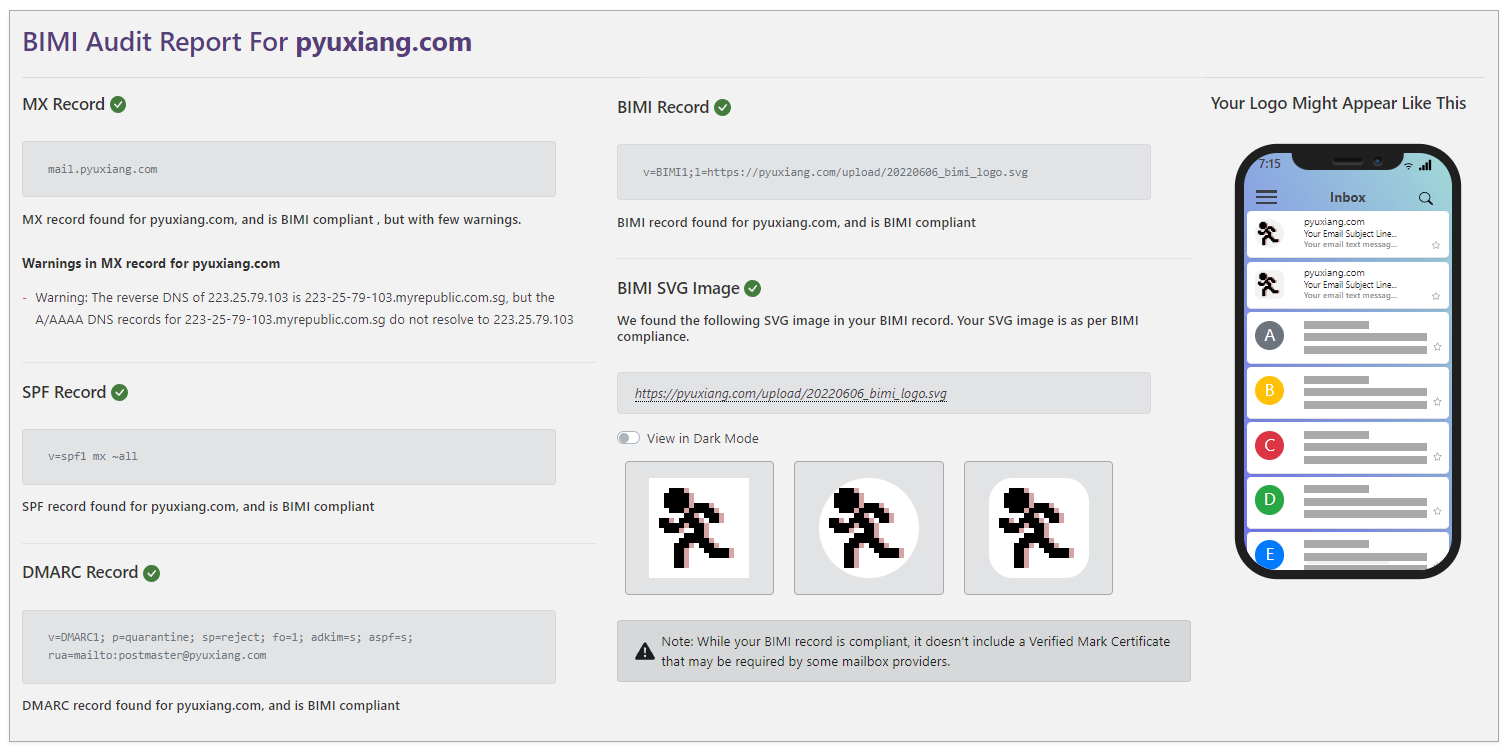
For self-assertion, simply omit the VMC (Verified Mark Certificate) from the BIMI TXT record, while retaining the logo in SVG (P/S) format:
# Certified
v=BIMI1;l=https://images.solarmora.com/brand/bimi-logo.svg;a=https://images.solarmora.com/brand/certificate.pem

# Self-assertion
v=BIMI1;l=https://pyuxiang.com/upload/20220606_bimi_logo.svg

# DNS record
TXT record; Name = default._bimi.pyuxiang.com; Value = {{ ABOVE }}; TTL = 1 hour
Check for BIMI-compliance here: https://bimigroup.org/bimi-generator/
Convert PNG to SVG using Inkscape, then convert to SVG Tiny P/S format using conversion tools. More specifically, see the SVG format comparison.
Authentication to Postfix
Common use case to have services connect to Postfix, such that the latter acts as a mail relay. See this answer for a quick overview of the differences. Following this tutorial: https://doc.dovecot.org/configuration_manual/howto/postfix_and_dovecot_sasl/
# Verify dovecot SASL can be used
> postconf -a
cyrus
dovecot

> sudo apt install dovecot-core

> sudo apt install cyrus-imapd cyrus-clients cyrus-doc cyrus-admin sasl2-bin
> postconf -h smtpd_sasl_path

> sudo vim /etc/postfix/master.cf
> sudo vim /etc/default/saslauthd
> sudo netstat -tulpn | { read header; read header2; echo $header; echo $header2; grep master; }
> sudo testsaslauthd -u testuser -p testpassword -s smtp
> sudo openssl s_client -connect localhost:587 -starttls smtp
I can cry tears configuring this... https://help.ubuntu.com/community/Postfix
https://ubuntu.com/server/docs/mail-postfix
Trying again on 2022-05-28. Using Dovecot instead of Cyrus, since more common.
# Verify Dovecot is available as SMTP SASL
> postconf -a

# Install Dovecot
> sudo apt install dovecot-core

# Certificate generation
# Nowadays can use Let's Encrypt on mail server hostname as well
# https://www.eff.org/deeplinks/2019/01/encrypting-web-encrypting-net-primer-using-certbot-secure-your-mailserver
> sudo certbot certonly --nginx -d mail.pyuxiang.com

# If no running webserver, can run with ''--standalone'' flag instead
# See: https://eff-certbot.readthedocs.io/en/stable/using.html#standalone

# Link to file via Dovecot
# https://doc.dovecot.org/configuration_manual/dovecot_ssl_configuration/#dovecot-ssl-configuration
# SSL set to required to use TLS for the *entire* connection, not just the SASL mechanism
# TLSv1.2 as the minimum TLS version is important!
> sudo vim /etc/dovecot/conf.d/10-ssl.conf
...
ssl = required
...
ssl_cert = </etc/letsencrypt/live/mail.pyuxiang.com/fullchain.pem
ssl_key = </etc/letsencrypt/live/mail.pyuxiang.com/privkey.pem
...
ssl_min_protocol = TLSv1.2
,,,

# Reload Dovecot configuration
> sudo doveadm reload

# Add certificate to Postfix configuration as well
# https://www.postfix.org/SASL_README.html
# 'smtpd_sasl_type' key may be missing, so create a new line for it
# 'smtpd_sasl_path' set to private/auth if Dovecot enable UNIX listener
# otherwise set to 'inet:127.0.0.1:12345' for TCP socket communication
> sudo vim /etc/postfix/main.conf
...
smtpd_sasl_type = dovecot
smtpd_sasl_path = private/auth
...
smtpd_tls_cert_file=/etc/letsencrypt/live/mail.pyuxiang.com/fullchain.pem
smtpd_tls_key_file=/etc/letsencrypt/live/mail.pyuxiang.com/privkey.pem
...

# Allow Postfix to talk to Dovecot over UNIX-domain socket
# https://www.postfix.org/SASL_README.html#server_dovecot_comm
> sudo vim /etc/dovecot/conf.d/10-master.conf
...
service auth {
  ...
  unix_listener /var/spool/postfix/private/auth {
    mode = 0660
    user = postfix
    group = postfix
  }
  ...
}
...

# Enable Dovecot plain and login authentication
# Optional, only if support for Outlook SMTP needed:
# https://doc.dovecot.org/configuration_manual/authentication/authentication_mechanisms/#authentication-authentication-mechanisms
> sudo vim /etc/dovecot/conf.d/10-auth.conf
...
auth_mechanisms = plain
...

# Reload both Dovecot and Postfix
> sudo doveadm reload
> sudo postfix reload

# Generate base64-encoded username and password, in the form:
# \0{{USERNAME}}\0{{PASSWORD}}
> echo -ne "\000test\000testpass" | openssl base64
AHRlc3QAdGVzdHBhc3M=

# Test authentication, using telnet...
# Note authentication uses base64 encoding of plaintext password for plaintext auth,
# and not the hashed versions, e.g. via CRYPT.
> telnet mail.pyuxiang.com 25
EHLO mail.pyuxiang.com
AUTH PLAIN AHRlc3QAdGVzdHBhc3M=

# ... or over TLS
> openssl s_client -connect mail.pyuxiang.com:25 -starttls smtp
EHLO mail.pyuxiang.com
AUTH PLAIN AHRlc3QAdGVzdHBhc3M=


##### Deprecated:
> sudo mkdir -p /etc/dovecot/certs
# Generate ECDSA private key
# https://wiki.archlinux.org/title/OpenSSL#Usage
> openssl genpkey -algorithm EC -pkeyopt ec_paramgen_curve:P-256 -out {{ FILE }}
#####

# Create custom passwd file for email
# https://doc.dovecot.org/configuration_manual/authentication/passwd_file/
# Example below uses test:testpass
# Note that bcrypt is not entirely deterministic: it introduces a custom work factor
# and random salt.
> doveadm pw -s CRYPT -p testpass
{CRYPT}$2y$05$E48qMgxb1f4pkA6wv9ym/uuhQH2LuvKP4Wg9rz24.fzTVjM1y2HUW
> sudo vim /etc/dovecot/private/passwd
test:{CRYPT}$2y$05$E48qMgxb1f4pkA6wv9ym/uuhQH2LuvKP4Wg9rz24.fzTVjM1y2HUW

# Setting environment variables for Dovecot
> sudo vim /etc/dovecot/dovecot.conf
...
passdb {
  driver = passwd-file
  args = /etc/dovecot/private/passwd
}
userdb {
  driver = passwd
}
...

# Not working AHHH

# Figured out the issue:
# 1. Must have read access to passwd-file! Including +x permissions for parent directories
# 2. sudo doveadm reload is sufficient to reload settings, and so is systemctl reload dovecot
# 3. Both system and custom passwords are available...! Be careful! This will be mitigated if
#    system logins (e.g. SSH) have password-only methods disabled (i.e. use key-based auth).
# 4. telnet localhost 25 is your best friend. Quit with 'Ctrl+]' then 'q'.
# 5. Read access to passwd-file must be granted to dovecot group, preferable permission:
#        root:dovecot with 440
#    Good to know that password db is not cached at startup time - password checks are done at auth time.
# 6. Given how there is a lag in auth success reply when passwd-file is not given appropriate permissions
#    to dovecot, but password exists in system passdb (i.e. shadow), likely passdbs are checked first.
# 7. userdb of driver=passwd seems to be implicit.
# 8. telnet localhost 587 cannot work because STARTTLS needs to be issued, i.e. SSL/TLS connection must
#    be initiated. Use 'openssl s_client -connect localhost:587 -starttls smtp' instead.
# 9. User in passdb does not seem to require a correspondence in userdb, i.e. a non-existent user/vuser
#    'helloworld' also passes authentication. Likely will face issues when attempting to link
#    with mailbox.

Note this setup will give issues if plain password authentication is enabled when connecting to the server, because now attackers have an ingress to SSH once access to internal network is established. Use proper PAM setup to prevent this.
Possibly good read: https://weakdh.org/sysadmin.html
On SSL vs TLS: https://doc.dovecot.org/admin_manual/ssl/#ssl
More good articles:
- GPU CUDA: https://developer.nvidia.com/cuda-zone
Dovecot IMAP / POP3
Remark: At some point, I should split this article into sane sections, e.g. Dovecot setup.
IMAP & POP3
The core Dovecot package does not come with the IMAP daemon, etc. Without these separate packages, the protocols variable in Dovecot will be missing (doveconf protocols). These protocols are installed with:
> sudo apt install dovecot-imapd

> ll /usr/share/dovecot/protocols.d/
total 12
drwxr-xr-x 2 root root 4096 Jun  4 17:04 ./
drwxr-xr-x 5 root root 4096 May 28 12:30 ../
-rw-r--r-- 1 root root   28 Jun  4 17:04 imapd.protocol

> doveconf protocols
protocols =  imap

# Check availability of IMAP port + login capability
> telnet localhost 143
Trying 127.0.0.1...
Connected to localhost.
Escape character is '^]'.
* OK [CAPABILITY IMAP4rev1 SASL-IR LOGIN-REFERRALS ID ENABLE IDLE LITERAL+ STARTTLS AUTH=PLAIN AUTH=LOGIN] Dovecot (Ubuntu) ready.
A LOGIN "{{ USERNAME }}" "{{ PASSWORD }}"
A OK ... Logged in

# Check remote connectivity of IMAP secure port
# Note port 993 is defined as IMAP over SSL/TLS, i.e. does not use STARTTLS subroutine
# Some forum posts from 2013 mention the need for '-crlf' flag in the command, but I observed no such need
> openssl s_client -connect mail.pyuxiang.com:993
---
read R BLOCK
* OK [CAPABILITY IMAP4rev1 SASL-IR LOGIN-REFERRALS ID ENABLE IDLE LITERAL+ AUTH=PLAIN AUTH=LOGIN] Dovecot (Ubuntu) ready.
A LOGIN "{{ USERNAME }}" "{{ PASSWORD }}"
A OK ... Logged in
Clearing the air about different ports
This gives a generally fantastic introduction: https://www.fastmail.help/hc/en-us/articles/360058753834-SSL-TLS-and-STARTTLS
SMTP ports typically run on 25, 587, or 465.
- Port 25 is traditionally used (and coupled with mail encryption with public key in the DNS record) for server-server mail transfer. Eventually mail servers started using the same port 25 for mail submission as well, i.e. for mail clients to submit mail to the mail server for subsequent relay.
- Port 465 was an IANA-defined SMTP over SSL/TLS port (i.e. implicit TLS) to allow encrypted communication from mail clients, to replace port 25 as the recommended secure submission port.
- Port 587 is eventually officially defined as the SMTP submissions port, requiring STARTTLS to upgrade the connection. This became widely accepted and deprecated port 465. Note however this is an opportunistic encryption method and by no means secure against MITM attacks - IETF since 2018 recommends the use of implicit TLS port 465.
Best practice:
- Port 25 open and enable STARTTLS, disable SASL authentication
- Port 465 open with SASL authentication enabled
- Port 587 (optionally) open with STARTTLS for compatibility reasons only
The other two mail sync protocols are more straightforward. Google "POP3 vs IMAP" to find out the difference between the two. In similar spirit to SMTP port, RFC8314 recommends negotiation of STARTTLS over cleartext channel be deprecated.
- Port 110 closed. This is cleartext POP3, with optional STARTTLS.
- Port 143 closed. This is cleartext IMAP, with optional STARTTLS.
- Port 993 open for IMAP with implicit SSL/TLS.
- Port 995 open for POP3 with implicit SSL/TLS.
Some configuration from online source mistakenly enable SASL authentication universally using Dovecot. To check SASL authentication on port 25:
# Check if SASL authentication on port 25 enabled, over plaintext
# Enabled if "AUTH ..." line displayed after EHLO call
# Note: Make sure STARTTLS is available!
> telnet localhost 25
EHLO mail.pyuxiang.com

# Check if SASL authentication on port 25 enabled, with STARTTLS
# Enabled if "AUTH ..." line displayed after EHLO call
> openssl s_client -connect localhost:25 -starttls smtp
EHLO mail.pyuxiang.com
To disable SASL authentication on port 25:
# Check that 'smtpd_sasl_auth_enable' is commented out, or not set to yes (no by default)
> cat /etc/postfix/main.cf | grep smtpd_sasl_auth_enable

# Check that the following configuration is not passed to Postfix 'smtp' service (this is port 25)
> vim /etc/postfix/master.cf
smtp      inet  n       -       y       -       10       smtpd
#  -o smtpd_sasl_auth_enable=yes  # should not be here

# Check that Postfix 'submission' service (port 587) has at least the following arguments
# and that 'smtpd_delay_reject' is set to yes (yes by default)
# See https://www.postfix.org/postconf.5.html#smtpd_sasl_auth_enable
> vim /etc/postfix/master.cf
submission inet n       -       y       -       10       smtpd
  -o smtpd_tls_security_level=encrypt   # require clients MUST use TLS encryption
  -o smtpd_sasl_auth_enable=yes         # allow SASL authentiction
  -o smtpd_relay_restrictions=permit_sasl_authenticated,reject   # allow authenticated client relay
#  -o smtpd_tls_auth_only=yes            # forces SASL authentication over TLS, implied by 'smtpd_tls_security_level=encrypt'

# Reload Postfix
> sudo systemctl reload postfix
Enable port 465:
> vim /etc/postfix/master.cf
smtps     inet  n       -       y       -       10       smtpd
  -o smtpd_tls_wrappermode=yes    # use implicit TLS instead of STARTTLS
  -o smtpd_sasl_auth_enable=yes   # allow SASL authentication
  -o smtpd_relay_restrictions=permit_sasl_authenticated,reject
Interesting answer on chroot no as default in Postfix: https://serverfault.com/a/951901
While you're at it, enforce a minimum TLS version as well, this is for Postfix < 3.6, see: https://www.postfix.org/postconf.5.html#smtpd_tls_mandatory_protocols
# Check your Postfix installation version
postconf -d mail_version

# https://serverfault.com/questions/803920/postfix-configure-to-use-tlsv1-2
smtpd_tls_exclude_ciphers = aNULL, LOW, EXP, MEDIUM, ADH, AECDH, MD5, DSS, ECDSA, CAMELLIA128, 3DES, CAMELLIA256, RSA+AES, eNULL, RC4
smtp_tls_exclude_ciphers = aNULL, LOW, EXP, MEDIUM, ADH, AECDH, MD5, DSS, ECDSA, CAMELLIA128, 3DES, CAMELLIA256, RSA+AES, eNULL, RC4
smtpd_tls_mandatory_protocols = !SSLv2, !SSLv3, !TLSv1, !TLSv1.1
smtpd_tls_protocols = !SSLv2, !SSLv3, !TLSv1, !TLSv1.1
smtp_tls_mandatory_protocols = !SSLv2, !SSLv3, !TLSv1, !TLSv1.1
smtp_tls_protocols = !SSLv2, !SSLv3, !TLSv1, !TLSv1.1

# Below is for Postfix >= 3.6
smtpd_tls_mandatory_protocols = >=TLSv1.2
smtpd_tls_protocols = >=TLSv1.2
smtp_tls_mandatory_protocols = >=TLSv1.2
smtp_tls_protocols = >=TLSv1.2
Mailbox
Postfix on Ubuntu typically has mail_spool_directory = /var/mail, so it stores mail for, e.g., the user anya in the location /var/mail/anya. Now this is in mbox format, i.e. a single file consolidating all the mail, but modern mailbox formats include Maildir which stores mail in a directory instead. Postfix infers the type of mailbox format:
- If
$mail_spool_directory/{{ USER }}is non-existent or is a file, then the format ismbox. - If it is a directory, the format is
Maildir.
To convert an existing mbox mailbox to Maildir, use mb2md (sudo apt install mb2md). Doesn't seem to recognize the file as mbox though... maybe I should manually convert. Eventually went with reading the mbox file directly in Thunderbird, then copying and pasting emails back to the Maildir configuration.
Update: After some experimentation, only the home_mailbox = {{ DIRECTORY }}/ seems to work, and it overrides mail_spool_directory and implants it right-smack inside the user home directory (not the user home mail directory) at /home/{{ USER }}/{{ DIRECTORY }}/new.
> vim /etc/postfix/main.cf
# Mailbox
home_mailbox = mail/Maildir/

> vim /etc/dovecot/conf.d/10-mail.conf
mail_home = /home/%u/mail
mail_location = maildir:~/Maildir
To test POP3 and IMAP:
# If no TLS encryption, use 'telnet localhost 995'
> openssl s_client -connect localhost:995
USER {{ USER }}
+OK
PASS {{ PASSWORD }}
+OK Logged in.

> openssl s_client -connect localhost:993
A LOGIN {{ USER }} {{ PASSWORD }}
A OK [CAPABILITY ...] Logged in
Final word of warning: Do use protection tools like fail2ban to automate banning of IPs attempting to intrude. Good practice not to spam logs to avoid getting domain blacklisted :O
Erratas:
- Postfix and Dovecot need to be able to see the certificates:
sudo chmod go+rx /etc/letsencrypt/{live,archive}/. NOPE: Need to use sudo for dovecot instead. - User and password databases to be stored in
/etc/dovecot/conf.d/10-auth.confinstead sudo chown root:dovecot /etc/dovecot/private/passwdandsudo chmod 440 /etc/dovecot/private/passwd- Difference between PLAIN and LOGIN is due format of requests: https://stackoverflow.com/a/59465532
EHLO >  telnet localhost 25
EHLO >  telnet mail.pyuxiang.com 25
EHLO >  openssl s_client -connect localhost:25 -starttls smtp
EHLO >  openssl s_client -connect mail.pyuxiang.com:25 -starttls smtp

FAIL >  telnet localhost 465
AUTH >  openssl s_client -connect localhost:465
AUTH >  openssl s_client -connect mail.pyuxiang.com:465

EHLO >  telnet localhost 587
EHLO >  telnet mail.pyuxiang.com 587
AUTH >  openssl s_client -connect localhost:587 -starttls smtp
AUTH >  openssl s_client -connect mail.pyuxiang.com:587 -starttls smtp


